Mother Miranda (Resident Evil Village) Cosplay

80% complete

Mother Miranda is... basically an evil scientist trying to resurrect her dead daughter. Honestly I want to make a cosplay of her final form, but her first form is much easier and faster to make, and several elements can be re-used. I needed to learn quite a few new tricks to accomplish this costume, so it has been a great learning experience so far. I needed to learn to use the laser cutter to work with foam and fabric, and I needed to create (with help) a new mechanism to get the wings to move the way I wanted. Below are some of the elements and explanation of how I made them.  

This project is still a work in progress. 

Aug 5th, 2022 @ 12:00 pm Mother Miranda Mask

This piece was actually pretty easy. I purchased the print file for this mask because I am NOT that savvy yet with blender. I may re-make this at another time but honestly the designer did a great job with the file. 

 That said I used the 3d printers to get this bad boy printed with a "fine" setting. I then sanded and glued the thing together. To finish it off I used filler primer and more sanding, then painted it gold and did detail painting for shadows and highlights. Honestly this was by far the easiest part of the costume 

Aug 16th, 2022 @ 12:00 pm Mother Miranda Sash

So I have no idea how to use an embroidery machine. I know how to hand embroider but FUUUUUUdge that noise. This sash is extremely detailed and complicated, so I wanted to find a way to get that level of detail without all the work involved in hand embroidering or the money involved in buying the software for xerocraft's embroidery machine. 

My default tool is the Laser!! Pew Pew! I created a vector file of the design, then cut lame and wonder web at the same time to create an instant applique of the sash pattern! Iron that baby on and you are done with the hard part! Its not quite as nice looking as I would like but for the absolutely brief amount of time it took it looks fabulous!

Aug 27th, 2022 @ 12:00 pm Mother Miranda Halo

Mother Miranda Halo COMPLETE! I created various vector file layers to cut and etch various thicknesses of foam to sandwich together to make the halo. Once made it was just a matter of sizing. Its probably still a touch small, but the laser cutter bed is a limiting factor. 

Man that new laser is AWESOME! My file wasn't quite compatible with lighburn but it was super easy to fix and convert everything. The end result is so pretty. I still want to add more depth, so I need to go back in and paint some more, but so far its looking quite good. Roses and eyes are purchased foam roses and floral balls cut in half. Pearls were added for details. Puff paint was used for the shallower details.

Once I get the wings fixed and moving I will have another issue... This thing is wide enough that either the wings will be in front of it, and obscure it, which isn't accurate to the character, or it will be behind it and the back two wings wont be able to curl forward........

Tomorrow me problems

Aug 30th, 2022 @ 12:00 pm Mother Miranda Outfit

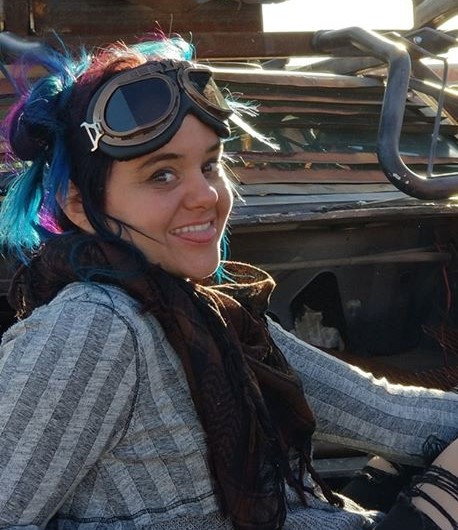
Im insane for making this... I live in Arizona... What was I thinking...

This costume has a number of layers, some of which I am creatively omitting so that I don't die of heat stroke inside 15 min of any given convention... There is the base layer underskirt with fathers sewn to the base, turned upward so you can really see the layers. I used goose shoulder feathers to best match the shape and size of the feathers on her dress. The base fabric is a light cotton so that it breaths but maintains its shape. I had contemplated an even thinner material but it collapsed in too easily and ruined the line of the dress. Tule was another option but its so freaking itchy I would need another layer of something anyway. 

Over the feather dress is a tattered dress with two contrasting fabrics with an empire waist. Above the waist is a smoother fabric and below is a loosely woven natural fabric. I couldn't find this rough fabric in anything but off white. Its very like a soft potato sack like material, but heavier, softer, and more tightly woven. I had to dye it to get it black, but that's not too terribly difficult with a natural fiber. I didn't get it as dark as I wanted, but luckily the lighter color mimics the slight shine it has in the game for photos. I am pretty sure this is where the under sleeves are from in the game, but I made the dress sleeveless instead so that at least some part of me could stay cool. 

I made a pattern by draping over a mannequin that is roughly my proportions. I then tailored the dress to me before sewing everything together. The inner and outer liner of the top of the empire dress is a light cotton to keep me as cool as possible while maintaining the look of the dress for the few parts where it shows. A mesh was sewn into the collar seam during construction to create the upper mesh bodice piece and lace was hand sewn to it to mimic the detail at the top of the collar of the dress. The two different skirt pieces create the inner and outer "liners"  so that both the inside and outside have all finished seams. A zipper at the side seam creates room so that I can get into it since no fabrics are stretch in this particular outfit. 

OVER TOP OF THIS there is a COAT. Shoot me.  I patterned the coat free hand with muslin and made adjustments as needed before making cuts in the final materials. It needed to be made of a thicker material on the outside to get the look and structure right for the torso. Luckily the sleeves on the outer coat are actually a thin tattered material, so I got away with very light sleeves. Technically there should be those under sleeves from the lower dress, but SHHHH!!! No one will notice if you don't tell them!! I also lined it with an extremely light gauze material. It had enough structure to get me clean seams along the edges, but adds very little weight or heat retention to the overall garment. It also looks nice and worn, which fits the character should it ever be visible. 

All in all I think for all the substitutions I made so that I don't die It looks pretty good. I may make some sleeves, bolero style, for under the coat for accuracy should I ever have the chance to wear this somewhere cold. 


Sep 14th, 2022 @ 12:00 pm Wing mechanism update

We have the 3 top wings figured out!!! Guy was a huge help scaling my design up and getting the angles fixed for some me sized wings! This is one of my favorite things about Xerocraft. I can come up with basic mechanisms, designs and ideas, but Im not well versed in everything. Fellow makers in the space can sometimes help fill in the gaps and make designing so much easier! Instead of my usual method of trial and error, which is expensive time and material wise, Guy could mock it up in AutoCAD and change measurements and test movement relatively quickly by comparison. Hats off to you, sir! Sadly the lower two wings cant use this mechanism since those wings need to fold in and down, not just straight in, but 3 wing sets down!! GO TEAM XEROCRAFT!

I also had another member, Steve Bowtie, machine the shafts that connect each wing together. I can do many things... using the mill is not one of them.

We did a few prototype cuts and builds using materials and tools available in the laser shop. I then got the final design laser cut out of aluminum for added durability and stability. I had a customer ask for a set of 3 (6 total) wings and it was a great opportunity to test out the look and feel of the 3 sets that would have this mechanism. Added bonus their distribution was lower down so the top wings avoided the halo for now. Enjoy the progress photos ;)